Instruction:
1. Clean and dry the surface properly, the surface should be free of dust and grease.
2. Peel adhesive backing on both pieces.
3. Determine the best position and press firmly to set in place. The button should be facing downward
4. Wait for 24hours for the vest adhesion.
Instruction:
1. Clean and dry the surface properly, the surface should be free of dust and grease.
2. Peel adhesive backing on both pieces.
3. Determine the best position and press firmly to set in place. The button should be facing downward
4. Wait for 24hours for the vest adhesion.
Instruction:
1. Clean and dry the surface properly, the surface should be free of dust and grease.
2. Peel adhesive backing on both pieces.
3. Determine the best position and press firmly to set in place. The button should be facing downward
4. Wait for 24hours for the vest adhesion.
Instruction:
1. Clean and dry the surface properly, the surface should be free of dust and grease.
2. Peel adhesive backing on both pieces.
3. Determine the best position and press firmly to set in place. The button should be facing downward
4. Wait for 24hours for the vest adhesion.
Instruction:
1. Clean and dry the surface properly, the surface should be free of dust and grease.
2. Peel adhesive backing on both pieces.
3. Determine the best position and press firmly to set in place. The button should be facing downward
Instruction:
1. Clean and dry the surface properly, the surface should be free of dust and grease.
2. Peel adhesive backing on both pieces.
3. Determine the best position and press firmly to set in place. The button should be facing downward
Instruction:
1. Clean and dry the surface properly, the surface should be free of dust and grease.
2. Peel adhesive backing on both pieces.
3. Determine the best position and press firmly to set in place. The button should be facing downward
Instruction:
1. Clean and dry the surface properly, the surface should be free of dust and grease.
2. Peel adhesive backing on both pieces.
3. Determine the best position and press firmly to set in place. The button should be facing downward
Instruction:
1. Clean and dry the surface properly, the surface should be free of dust and grease.
2. Peel adhesive backing on both pieces.
3. Determine the best position and press firmly to set in place. The button should be facing downward
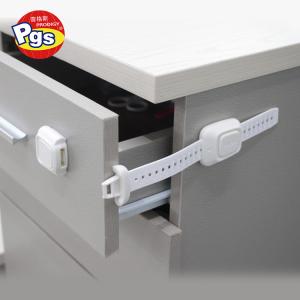
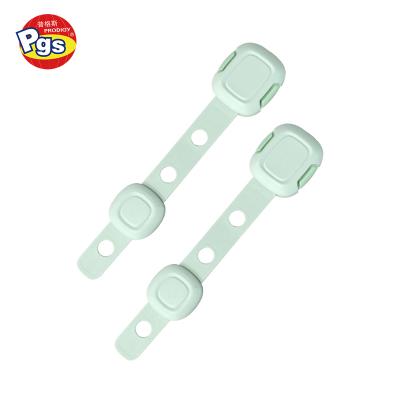
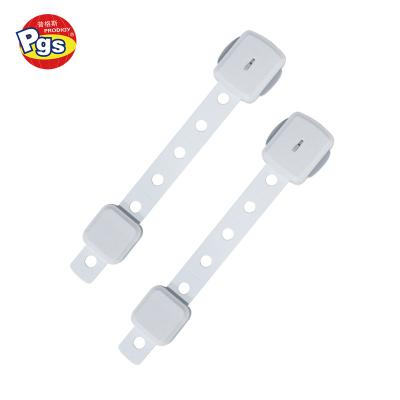
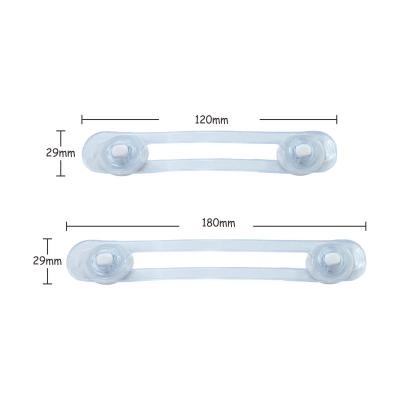
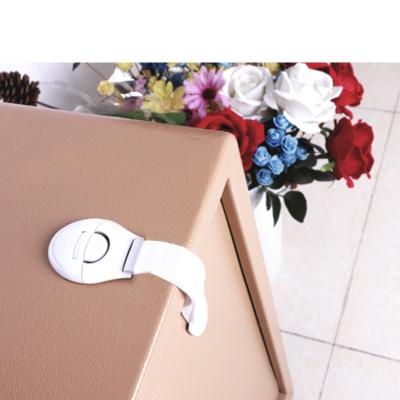
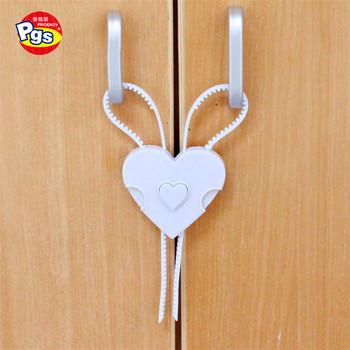
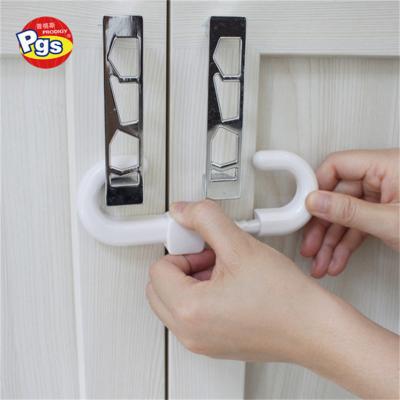
Product Description Childproof cabinet latches are safety devices designed to prevent young children from opening cabinets, drawers, or sliding doors, protecting them from accessing hazardous items (e.g., chemicals, sharp objects). These locks are commonly used in homes, kitchens, bathrooms, and offices.


 IPv6 network supported